





FAQs
Contact us if you have any more questions.
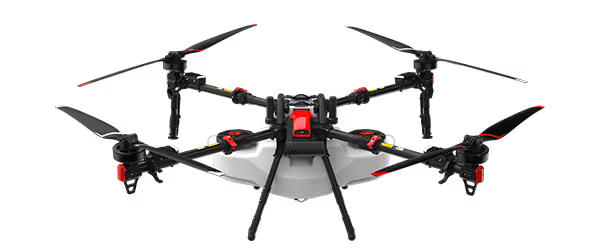
XAG P150 Drone Performance & Specs
The XAG drones on their own do not have the ability to identify and spray weeds. However, with the use of other mapping software such as the XAG RealTerra or Pix4D, it is easy to produce a high-definition map of an area then mark the weed affected zones. This map can then be easily transferred to the XAG system to act as a spot spraying tool.
For a tutorial and deeper explanation on this please see: Green on Brown Spot Spraying - Mapping fallow weeds with PIX4Dfields
The drone batteries last around 25 minutes with an empty payload, and 7 minutes with a full payload. However, this is not relevant in most situations. The more important piece of information here is that the P150 in most situations will be able to empty the entirety of its payload during one flight and then return home.
Limiting factors here may include Hilly Terrain, Spot Spraying and Long Travel time to and from the field and very low spray/spread rates. Please refer to the user manual for more specific information.
Yes - but you will require the RealTerra HD Mapping Payload to create High Definition Maps. This is an additionally purchased payload.
The P150 RevoSpray comes with a 70L spray tank.
The P150 RevoCast is an 115L tank that can carry 70kg.
Yes. Swarm operations, referring to multiple drones being flown concurrently by a single remote pilot, require specific approvals from the Civil Aviation Safety Authority (CASA). This includes obtaining a remote pilot licence (RePL), a remotely piloted aircraft operator's certificate (ReOC), and an approval to operate multiple drones simultaneously. Changes to manuals and a flight test is needed.
For more information on this please see: Swarm Operations Approvals
The warranty on most of the P150 parts and batteries is 1 year.
The P150 can fly at 18m per second. This equals to 64.8km per hour.
In terms of spraying and spreading – in optimal conditions at a 30L per ha rate
the P150 will be able to cover 25ha per hour.
Yes, the P150 has a droplet size range of 60µm - 500µm. The P150 can spray as low as 1L per ha and all the way up to 950L per ha. These parameters are easily adjustable within the XAG One App.
The P150 is completely automated during a pre mapped flight - however we always recommend that you are constantly watching the drone to avoid collisions and potential emergencies of people or animals entering the spray field.
The P150 will return home on its own when it has either run out of chemical or its battery is low.
You can of course fly and spray manually with the P150 as well.
There are multiple ways to map your fields with the P150.
First of all, you can map via a Google Maps image using your finger to mark boundaries and obstacles within the XAG ONE app.
Secondly, you can map using the drone itself to plot points for boundaries and obstacles using the downward facing camera on the P150.
Thirdly, you can map using the XRTK6, which allows you to plot points for boundaries and obstacles with the handheld XRTK6. This is purchased separately as many operators do not map via handheld.
And lastly you can map over the top of pre-existing maps you may already have for your area by uploading them to your XAG ONE App, allowing you to then build your boundary and obstacles around the already created map.
All of your map fields can be saved for later use.
For more information on this please see the user manual and Tutorial 04: XAG P150 Field Mapping Guide | XRTK6 Pro & Flight to Map Methods
XAG P150 Drone Installation & Operation
Yes, the P150 is compatible with B13960S and B13970 smart batteries. However, to maintain flight safety and stability, the maximum allowable payload must be reduced when using these older battery models. Please refer to the payload adjustment notifications displayed within the XAG One App during operation.
While not strictly required, it is highly recommended to install a valid SIM card in the P150. A SIM card enables stable data transmission within mobile network coverage, allowing the aircraft to:
- Connect directly to the CORS network
- Automatically upload operation records
- Perform remote firmware updates
Using a SIM card significantly enhances connectivity and operational efficiency.
If your battery encounters any of the above scenarios, it indicates that the battery may be a complex usage issue and should be returned to our warehouse for diagnosis and troubleshooting.
Please follow the Return Guide to start an after-sales enquiries.
If your charger is not charging the batteries, the issue may be related to one of three components: the power source (e.g., wall outlet or generator), the battery, or the charger itself. Please follow the steps below to identify the cause:
- Check the Power Source
Ensure that the power source delivers stable and sufficient power to the charger. Refer to the Battery S-Charger CM13600 user manual for the required power specifications, for more details please visit Download Center - Battery System.
Try using an alternative power outlet or generator to rule out any fluctuations or supply issues.
- Test the Batteries
Use a different charger to attempt charging the same batteries:
- If the alternate charger is also unable to charge the batteries, the batteries themselves are likely faulty.
- If the alternate charger charges the batteries successfully, the original charger is likely the source of the issue.
- Next Steps
If the issue appears to be with the charger or battery, it needs to be returned to our warehouse for further inspection, please refer to the Return Guide to initiate an after-sales service request.
There are two types of logs that may need to be uploaded for diagnostics or support purposes:
1) Flight Log
The Flight Log records all data generated while the aircraft is airborne. To upload it:
• Connect the SRC4 remote controller to the internet (via an activated SIM card or mobile hotspot).
• Open the XAG One APP (version 6.1.0 or later) and go to:
Me > Settings > Data Sync – then enable all three options.
• Power on both the aircraft and the SRC4 to establish a connection.
• Navigate to XAG One APP > Me > Device Page > P150 Device Details Page > Communication System > Internet Access > Connect via central device’s network only
• Navigate to:
XAG One APP > Me > Device Page > P150 Device Details Page > General > Device Log > Selects logs to upload > Select relevant flights to upload
Note: “No Data” means there is no flight operation conducted during that period of time.
2) APP Log
The APP Log captures data generated during app usage. To upload:
• Ensure your SRC4 is connected to the internet.
• Open the XAG One APP and go to:
Me > Settings > Upload App Logs.
• Select and upload all logs corresponding to the dates of operation.
The black impeller is constructed from a highly corrosion-resistant material, making it ideal for use in liquids with temperatures above 15°C. It is engineered to provide greater durability and stability in warmer or more demanding environments.
The grey impeller, on the other hand, is made from a softer material with lower corrosion resistance. It is best suited for cooler applications, where the liquid temperature remains below 15°C and corrosion exposure is minimal.
- Power on both the SRC4 remote controller and the DL1 unit.
- Ensure the SRC4 is connected to the internet via Wi-Fi or a SIM card.
- Enable Bluetooth on the SRC4 by swiping down from the top of the screen and toggling the Bluetooth function.
- Wait for the DL1 to complete its initialization process.
- On the SRC4, open the XAG One APP and navigate to: Me > Device Page > "+" (top right corner)
- Scan the QR code or manually enter the Serial Number (SN) of the DL1 to add the device.
Note: The QR code and SN are located on the side of the DL1 unit.
- Confirm the pairing when prompted.
- The DL1 will now appear in your device list within the app.
- Power on both the SRC4 remote controller and the XRTK6 Pro unit.
- Ensure the SRC4 is connected to the internet via Wi-Fi or a SIM card.
- Enable Bluetooth on the SRC4 by swiping down from the top of the screen and toggling the Bluetooth function.
- Wait for the XRTK6 Pro to complete its initialization process.
- On the SRC4, open the XAG One APP and navigate to: Me > Device Page > "+" (top right corner)
- Scan the QR code or manually enter the Serial Number (SN) of the XRTK6 Pro to add the device.
Note: The QR code and SN are located on top of the XRTK6 Pro unit.
- Confirm the pairing when prompted.
- The XRTK6 Pro will now appear in your device list within the app.
Note: For mapping and operation, it is highly recommended to have XAG DL1 Data Link as central hosting unit to link XRTK6 Pro and other equipment to ensure stable connection.
The large-size Spiral Feeder is pre-installed by default on the RevoCast P4.
Two additional sizes — Small and Medium — are available for separate purchase to suit different spreading requirements.
For more information or to purchase alternative sizes, please visit our shop.
XAG P100 Pro Drone Performance & Specs
The XAG drones on their own do not have the ability to identify and spray weeds. However, with the use of other mapping software such as the XAG RealTerra or Pix4D, it is easy to produce a high-definition map of an area then mark the weed affected zones. This map can then be easily transferred to the XAG system to act as a spot spraying tool.
For a tutorial and deeper explanation on this please see: Green on Brown Spot Spraying - Mapping fallow weeds with PIX4Dfields
The drone batteries last around 25 minutes with an empty payload, and 7 minutes with a full payload. However this is not relevant in most situations. The more important piece of information here is that the P100 Pro in most situations will be able to empty the entirety of its payload during one flight and then return home.
Limiting factors here may include; Hilly Terrain, Spot Spraying and Long Travel time to and from the field and very low spray/spread rates. Please refer to the user manual for more specific information.
Yes - but you will require the RealTerra HD Mapping Payload to create High Definition Maps. This is an additionally purchased payload.
The P100 Pro RevoSpray now comes standard with a 60L spray tank. (Upgrade Kit)
The P100 Pro RevoCast is an 80L tank that can carry 60kg.
Yes. Swarm operations, referring to multiple drones being flown concurrently by a single remote pilot, require specific approvals from the Civil Aviation Safety Authority (CASA). This includes obtaining a remote pilot licence (RePL), a remotely piloted aircraft operator's certificate (ReOC), and an approval to operate multiple drones simultaneously. Changes to manuals and a flight test is needed.
For more information on this please see: Swarm Operations Approvals
The warranty on most of the P100 Pro parts and batteries is 1 year. For a more detailed look at the warranty terms and conditions, please see the Warranty Period Document under the P100 Pro Downloads Section.
The P100 Pro can fly at 13.8m per second. This equals to 49.68km per hour.
In terms of spraying and spreading – in optimal conditions at a 30L per ha rate the P100 Pro will be able to cover 20ha per hour.
Yes, the P100 Pro has a droplet size range of 60µm - 500µm. The P100 Pro can spray as low as 1L per ha and all the way up to 750L per ha. These parameters are easily adjustable within the XAG One App.
The P100 Pro is completely automated during a pre mapped flight - however we always recommend that you are constantly watching the drone to avoid collisions and potential emergencies of people or animals entering the spray field.
The P100 Pro will return home on its own when it has either run out of chemical or its battery is low.
You can of course fly and spray manually with the P100 Pro as well.
There are multiple ways to map your fields with the P100 Pro.
First of all, you can map via a Google Maps image using your finger to mark boundaries and obstacles within the XAG ONE app.
Secondly, you can map using the drone itself to plot points for boundaries and obstacles using the downward facing camera on the P100 Pro.
Thirdly, you can map using the VRTK Function on the ARC3 controller, which allows you to plot points for boundaries and obstacles with the actual controller.
And lastly you can map over the top of pre-existing maps you may already have for your area by uploading them to your XAG ONE App, allowing you to then build your boundary and obstacles around the already created map.
All of your map fields can be saved for later use.
XAG P100 Pro Drone Installation & Operation
Telstra operates using three different Access Point Names (APNs), which may vary depending on your geographic location. If your ARC3 Pro is not connecting to the internet despite having a Telstra SIM card installed, it is likely due to incorrect or unconfigured APN settings.
Before proceeding, ensure that:
• The Telstra SIM card is active
• A valid data plan is associated with the SIM
To configure the correct APN settings, please refer to the XAG P100 Pro – Pilot’s Operation Handbook V2.0, specifically:
• Page 88 – SIM APN Settings for Telstra
• Download the Handbook: XAG P100 Pro – Pilot’s Operation Handbook V2.0
Proper APN configuration will ensure optimal connectivity across different locations.
To connect the ARC3 Pro to a mobile hotspot or a home Wi-Fi network, please follow the instructions in the XAG P100 Pro – Pilot’s Operation Handbook V2.0:
• Page 90 – Share Internet with ARC3 Pro via WIFI Hot Spot
Download the Handbook: XAG P100 Pro – Pilot’s Operation Handbook V2.0
To connect the ARC3 Pro to an RTK4 Rover, please follow the instructions in the XAG P100 Pro – Pilot’s Operation Handbook V2.0:
• Page 96 – Link Device - XRTK4 Mobile Station
• Download the Handbook: XAG P100 Pro – Pilot’s Operation Handbook V2.0
No. Based on hardware compatibility specifications, the P100 Pro is not compatible with the SRC4 Remote Controller.
There are two types of logs that may need to be uploaded for diagnostics or support purposes:
1) Flight Log
The Flight Log records all data generated while the aircraft is airborne. To upload it:
• Connect the ARC3 Pro remote controller to the internet (via an activated SIM card or mobile hotspot).
• Open the XAG One APP (version 6.1.0 or later) and go to:
Me > Settings > Data Sync – then enable all three options.
• Power on both the aircraft and the ARC3 Pro to establish a connection.
• Ensure your Android device is connected to the ARC3 Pro’s Wi-Fi.
• Navigate to:
XAG One APP > Me > Device Page > P100/P100 Pro > Device Details Page > Upload Flight Log.
• Select and upload all relevant flight records.
2) APP Log
The APP Log captures data generated during app usage. To upload:
• Ensure your mobile device is connected to the internet.
• Open the XAG One APP and go to:
Me > Settings > Upload App Logs.
• Select and upload all logs corresponding to the dates of operation.
To offset correct the field mapped, please follow the instructions in the XAG P100 Pro – Pilot’s Operation Handbook V2.0:
• Page 147 – Offset Correction
• Download the Handbook: XAG P100 Pro – Pilot’s Operation Handbook V2.0
If your battery encounters any of the above scenarios, it indicates that the battery may be a complex usage issue and should be returned to our warehouse for diagnosis and troubleshooting.
Please follow the Return Guide page to start an after-sales enquiries.
If your charger is not charging the batteries, the issue may be related to one of three components: the power source (e.g., wall outlet or generator), the battery, or the charger itself. Please follow the steps below to identify the cause:
- Check the Power Source: Ensure that the power source delivers stable and sufficient power to the charger. Refer to the Battery S-Charger CM13600 user manual for the required power specifications, for more details please visit Download Center - Battery System.
Try using an alternative power outlet or generator to rule out any fluctuations or supply issues.
- Test the Batteries: Use a different charger to attempt charging the same batteries:
- If the alternate charger is also unable to charge the batteries, the batteries themselves are likely faulty.
- If the alternate charger charges the batteries successfully, the original charger is likely the source of the issue.
- Next Steps: If the issue appears to be with the charger or battery, it needs to be returned to our warehouse for further inspection, please refer to the Return Guide to initiate an after-sales service request.
If the drone hasn't been used for a while, it may need to be paired again. Follow these steps to re-establish the connection:
Devices you will need:
- ARC3 Pro
- Android Smart Phone (Android 10 and above)
- SIM card
- P100 Pro drone
Step-by-step Pairing Instructions:
- Insert the SIM card into your ARC3 Pro > Turn on the controller and wait for it to be initialized > On your Android phone, connect to the ARC3 Pro’s Wi-Fi.
- Turn on the drone and wait for it to be initialized > then quickly press the battery power button 3 times, double beeping will be heard >Wait for the drone’s ESC light to start flashing yellow.
- Long press the ARC3 Pro power button for 10 seconds until you hear a beep — this puts the controller into pairing mode (you’ll see the third indicator light start flashing).
- When you hear another beep, pairing has been successful.
- Connect Android phone to the ARC3 Pro’s WIFI again when it is available.
- Navigate to XAG One APP > Me > Device Page > P100 Pro device details page > General – Remote Control Bound > Select ARC3 Pro to confirm the binding.
- Connection Verification: Navigate to General page to verify that the remote controller status is “Connected”. Additionally, ensure the third indicator from the left on the ARC3 Pro Remote Controller is solid green, confirming successful connectivity.
No. When the P100 Pro is equipped with the RevoCast system, it requires two batteries installed to meet the power demands and ensure safe operation.
XAG P100 Drone
- Maximum Flight Height: 30 meters, adhering to UAV flight management regulations.
- Maximum Flight Speed: 13.8 meters per second.
- Hovering Time:
- No-load: 17 minutes with a dual 20000 mAh battery setup, at a take-off weight of 48 kg.
- Full load: 7 minutes with the same battery setup, at a take-off weight of 88 kg.
- Note: Performance metrics tested at sea level under wind speeds below 3 m/s; for reference only.
Capable of dispersing 280 kg of urea in 22 minutes on a single battery charge (two batteries).
Note: This is based on calculations from using a full 40 kg urea tank 7 times over a roughly 30-meter field in 22 minutes. The operating parameters for the P100 are: 10 kg/0.06 ha, 7 m spread width, 13.8 m/s flight speed. This data accounts for time taken for granule refilling and takeoff/landing processes. Real-world results may vary depending on field conditions, wind speeds, firmware updates, etc.
- Granule Container Capacity: Increased from 25 L in older models to 60 L in the P100.
- Discharge Efficiency: Enhanced from 40 kg/min to 80 kg/min.
- Smart Liquid Tank Capacity: Expanded from 16 L in V40 and 20 L in P40 to 40 L in the P100.
- Design: The P100 introduces a separable design, allowing the flying platform to detach from the task systems. This makes for a more flexible functional switch, easier transportation, and more straightforward maintenance.
An ability for the drone to detach its flying platform from its task systems. This reduces the handling weight, making switches, transportation, and maintenance much simpler.
Enhanced security with a double safe lock and a tri-proof plug. This ensures fast and secure detaching and installation.
The P100 owes its efficiency to:
- A brand-new motor that boasts an innovative dual heat dissipation design, significantly extending the motor's lifespan.
- Integral FOC ESCs that adjust power precisely to minimize consumption. They also leverage wind fields to optimize heat dissipation.

The P100 drone has an IPX7 water resistance rating, making it resilient against challenging operational environments.
For safety, personnel should maintain a distance of at least 10 meters from the P100 during its take-off and landing phases.
XAG RevoCast 2 Spreading System
Certainly! The P100's liquid tank boasts a full capacity of 60 L. Thanks to its separable design, the P100 can efficiently detach its flying platform from the spreading task systems. This design feature facilitates easier functional switches, more convenient transportation, and simpler maintenance.
The RevoCast 2 achieves an effective spread width ranging from 3 to 6 meters. However, this can vary based on factors such as flight altitude, the weight and shape of seeds, dosage, and surrounding conditions.
The system is optimized to manage dry and solid granules ranging between 1 to 6 mm in size.
The RevoCast 2 Spreading System boasts several enhancements:
- It supports fast spreading even while flying, reaching speeds of up to 13.8 m/s.
- The vertical centrifugal spreading disc is resilient, resisting winds up to 10 m/s, and ensures more uniform spreading.
- The system achieves a discharge efficiency as high as 80 kg/min.
- The vertical sector-shaped design is implemented to protect seeds from damage during sowing.
- An inverted trapezoidal design in the container facilitates smoother seed feeding.
- The system has been designed with a sensor to detect remaining granules, ensuring that no spots are missed and that the system doesn’t operate with an empty granule container.
The smart screw feeder in the P100 offers several advantages:
- Availability in 3 distinct sizes to cater to various spreading scenarios.
- It's designed for quick detachment, making it easy to clean.
- The feeder is corrosion-resistant and boasts a reinforced coating, ensuring increased durability.
Power System
Absolutely! The P100's Smart Battery (B13960S), SuperCharger (CM12500P), and Auto SuperCharge Station (GC4000+) are compatible with those from the previous generation models, V40 and P40. This compatibility offers users the benefit of cost-saving by reducing the need for separate purchases.
The B13960S Smart Battery is designed with a waterproof rating of IP65.
It boasts a rapid SuperCharge feature that charges the battery in approximately 15 minutes.
Obstacle Sensing & Avoidance System
The dynamic radar systematically processes data related to an obstacle's position, distance from the drone, direction of its movement, and its relative velocity. This information enables the P100 to make real-time adjustments to its flight path.
Certainly! When the P100's radar senses an obstacle with a diameter greater than 1 cm located 15 meters away, it begins to decelerate. As the drone approaches the obstacle and is roughly 8 meters away, it starts to navigate around it. If the obstacle remains in its path, the P100 will hover, ensuring the blade's tip stays at least 2.5 meters away from the obstacle.
The dynamic radar on the P100 has the following detection specifications:
Valid Detection Range: 1.5 to 40 meters.
Field of View (FOV): horizontally it spans ±40° and vertically from -45° up to +90°.
Communication & Control System
Absolutely! The P100's communication & control system is fully compatible with the V40 and P40 models. This ensures a reduced purchase cost and facilitates easy replacements.
Certainly! The available mapping methods include:
- Manual point addition via ACS2.
- M series mapping.
- Full support for third-party mapping results.
The XAG One APP stands out because of the following advantages:
- Seamless execution of operations across multiple fields.
- Enables easy field data sharing, fostering improved teamwork.
- Users can share reports post-operation.
- Offers fully autonomous operation, making the whole process more intuitive and straightforward.
The ACS2 Smart ControlStick boasts a battery life of 4-5 hours during active use and can last up to 12 hours on standby.
The ACS2 Smart ControlStick is designed for utmost efficiency, with the following benefits:
- It's user-friendly, ensuring a low learning curve with features like pure key operation and voice broadcast.
- Designed for hands-free operation, it's lightweight and portable, which significantly improves operational efficiency.
XAG V40 Drone
The V40 offers two product versions with varying blade rotation directions. Please consult your dealer for specifics and always refer to the user manual provided with the product before use.
Unlike conventional multi-rotor drones, the V40 incorporates a tilting twin-rotor structure. This design greatly enhances aircraft performance by providing a more focused wind field. As a result, the V40's spray penetration is over twice as effective as that of traditional drones.
Absolutely! The V40 is designed with foldable arms and propellers, reducing its handling volume by one-third. This makes it more convenient and efficient to transport.
For safety reasons, a minimum distance of 10 meters is recommended when the V40 is taking off or landing.
The V40 boasts an IP67 protection rating, making it resilient and suitable for harsh operational environments.
XAG RevoSpray
The V40 comes with a liquid tank boasting a full capacity of 16 L. Thanks to its swappable design, users can effortlessly remove or replace it as required.
No, the V40's liquid tank is not compatible with those of the P30, XP2020, or P20 models.
The V40's advanced spraying system offers adjustable droplet sizes ranging from 60 to 400 microns.
Maximum System Flow Rate: 10 L/min.
Maximum Flow Rate (Single Pump): 5 L/min.
With the innovative dual nozzle design, the V40 achieves a spraying width of 5-10 meters. Note: This spray swath value is based on tests conducted at various operation heights and wind speeds and serves only as a reference.
The V40's RevoSpray™ offers advanced centrifugal atomization spraying technology, paired with an upgraded brushless motor. This setup provides adjustable droplet sizes between 60 to 400 microns and boosts the maximum flow rate to 10 L/min. Additionally, the twin-rotor wind field allows for a maximum spray width of up to 10 meters. As always, spray swath values are tested values and should be used only as a reference.
Absolutely! The V40 is engineered to identify and select the optimal route during continuous flights, ensuring both time and battery efficiency.
XAG RevoCast
The RevoCast™ Spreading System is designed for both the V40 and P40 models, which come equipped with 25 L tanks.
The spread width ranges from 4-10 meters. This is influenced by factors such as the operating altitude, the type of seeds used, the dosage, and the rotational speed of the spreading discs.
The system is optimized for dry and solid granules ranging from 1-10 mm in size.
The RevoCast™ Spreading System is robustly built and boasts an IP65 waterproof grade.
Distinct features of the RevoCast™ Spreading System include:
- Dual rotary spreading discs to ensure an even distribution of seeds.
- A variable screw feeder that allows precise, adjustable spreading and minimizes seed damage.
The dual rotary spreading discs promise a thorough and even distribution of seeds. Under optimal conditions, they can achieve a maximum spread width of up to 10 meters.
The feeder boasts an impressive efficiency rate of 17.5 L/min.
Obstacle Sensing & Avoidance System
The V40's multi-directional radars offer:
- Automatic obstacle avoidance in both horizontal and vertical directions.
- Precise height maintenance in the downward direction, enabling terrain adaptation during flight.
The dynamic radar identifies obstacles based on their position, distance, direction of motion, and relative velocity.
The V40 starts decelerating upon detecting obstacles larger than 1 cm in diameter from 15 meters away. It begins to navigate around the obstacle at a distance of about 6 meters or hovers with the blade's tip approximately 2.5 meters away from the obstacle.
For the V40's dynamic radar:
- Valid Range: 1.5 to 40 meters.
- Field of View (FOV): horizontal ± 40°; vertical ± 45°.
Yes, the V40's downward terrain radar enhances its obstacle avoidance capabilities, ensuring safer flights even in challenging terrains.
Power System
No, the V40's B13960S Smart Battery is not interchangeable with the B13860S Smart Battery used by the P30 and XP2020.
The B13960S Smart Battery comes with an IP65 waterproof grade.
Yes, it can charge the B13860S Smart Batteries when used with the A1 adaptor. For additional details, you can refer to the "Product Adaptation Table".
The CM12500P Intelligent SuperCharger can SuperCharge the V40's B13960S Smart Battery in approximately 15 minutes.
XAG RealTerra
Yes, the V40 with XAG RealTerra™ can produce both 2D HD maps and 3D HD maps for fruit trees and fields.
The V40, using XAG RealTerra™, captures images during its fully autonomous flight and can cover an area of 6.67 hectares in just 10 minutes.
XAG RealTerra™ boasts a special material protection that makes it waterproof and dust-resistant, ensuring its durability against erosion.
Communication & Control System
The ACS2 Smart ControlStick has an operational time of 4-5 hours and a standby time of 12 hours.
Yes, the ACS2 Smart ControlStick is compatible with both the V40 and the P40.
No, the ACS2 Smart ControlStick is not interchangeable with the P30 and XP2020. For further details on compatibility, you can refer to the "Product Adaptation Table".
The ACS2 Smart ControlStick offers:
- A low learning curve, making it simple-to-use with pure key operation and voice broadcast.
- A hands-free experience which increases operational efficiency.
- A lightweight and portable design.